Transition WordPress Site to SSL
Transitioning from HTTP to HTTPS has become critical. Thankfully, if you're using WordPress, the process is pretty simple. Here are 4 steps to transition your WordPress site to use and force SSL.
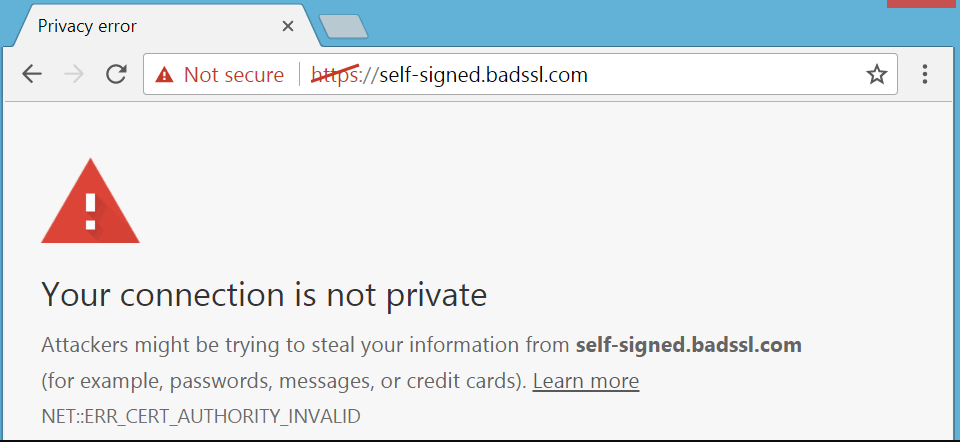
Back in July of this year, Google Chrome started marking all non-HTTPS sites as “Not Secure.” All the other major browsers quickly followed suit. Today, regardless of whether your website collects data, or is an eCommerce site or not, transitioning your site from HTTP to HTTPS has become critical. Thankfully, if you’re using WordPress, the process is pretty simple.
There are 4 main steps to force SSL in WordPress:
- Purchase & install the SSL certificate
- Convert all URLs in WordPress to SSL
- Fix any “Mixed Content” errors
- Force SSL Directive and Redirect
Step 1: Purchase an SSL Certificate
We recommend purchasing an SSL certificate from your website hosting provider. That way, they will likely handle all the frustrating certificate request, verification, and installation stuff for you.
For most websites, a standard SSL works just fine. It’ll allow you to encrypt all traffic to your main domain and to the www-version of it. An EV SSL, the one that gives you the green bar in your browser offers twice the encryption (256-bit instead of 128-bit), but there’s really minimal value for the average non-eCommerce site.
Step 2: Convert all URLs in WordPress to SSL
As with most things, there’s the easy way and the hard way to do this. Let’s stick to the easy way.
WordPress stores most URLs as absolute, meaning the full URL and not the relative path. That means we have to search the entire WordPress database and replace the old http://yoursite.com with the new https://yoursite.com in every page, post, setting, and meta value. That’s a LOT of work. Wouldn’t it be better to just search and replace? Isn’t that the whole point of a database? Yup.
We love the free WordPress plugin, Better Search Replace which does exactly that.
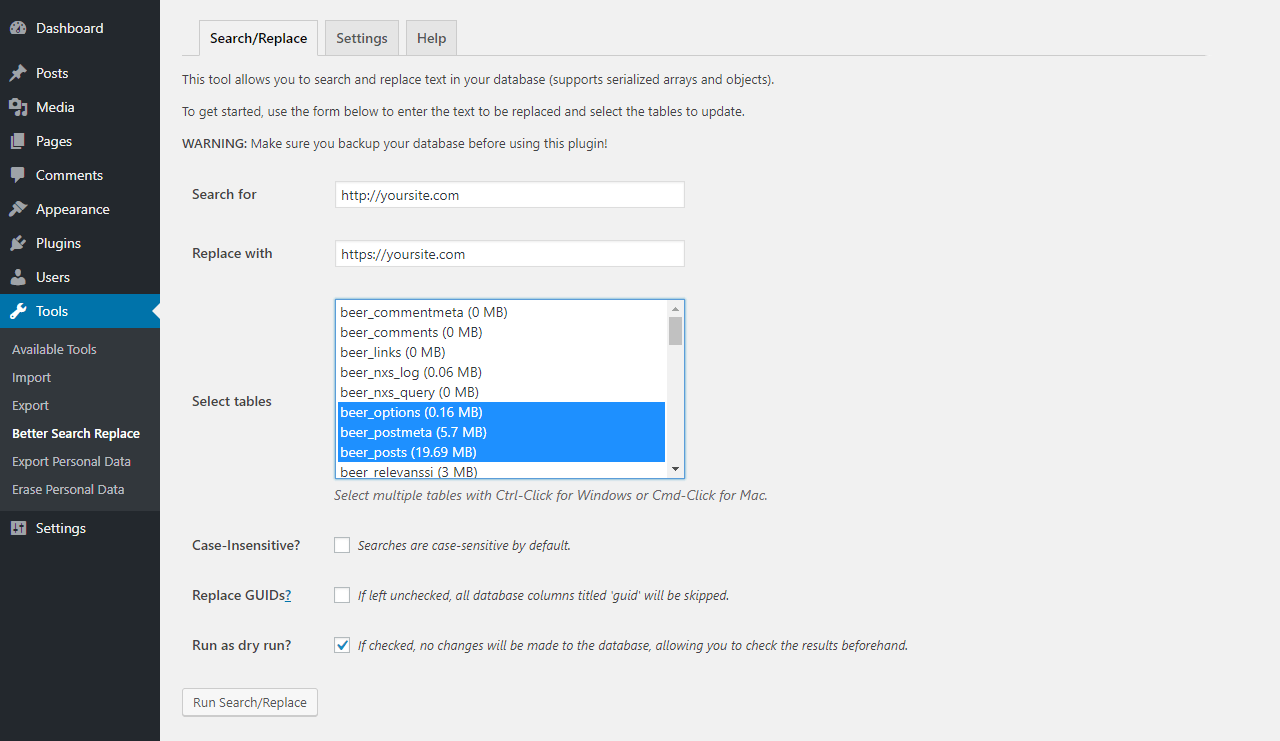
Just install the plugin from the WordPress Repo, activate it, and go to Tools >> Better Search Replace. From there, enter the string to search for, i.e. http://yoursite.com, and the string you want to replace that with, i.e. https://yoursite.com, select the tables to search, and click the Run Search/Replace button. There’s a checkbox you can select just above that button to do a “dry run,” which is handy for testing.
NOTE: Select all of the tables, and if you run into timeout issues, be sure to at very least select the wp_options, wp_postmeta, and wp_posts tables.
Step 3: Fix “Mixed Content” Errors
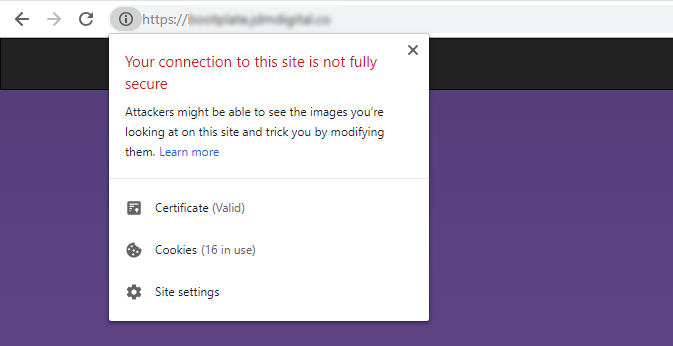
“Mixed content errors” are when there are some things being loaded over HTTPS and other loaded over HTTP. It can be a little frustrating to track all these down, but a good place to start is to view the page’s source code and do a “Find” for anything starting “http:”.
NOTE: I added the colon there so you’ll only see references to things that DON’T have the “s” at the end of HTTPS.
If your theme and plugins are all coded “the WordPress way” then you shouldn’t have any issues with mixed content errors. If you do, you might also check your theme’s functions.php file to see if any resources are being enqueued with hard-coded “http” in them.
Step 4: Force SSL Directive and Redirect
In your WordPress site’s core wp-config.php file, there’s a PHP global directive you can add that will tell WordPress to force SSL — especially for admin areas and logins. Here’s what to add to that file.
define('FORCE_SSL_ADMIN', true);Note: Be sure you paste that BEFORE the require_once(ABSPATH . 'wp-settings.php'); line which is usually at the bottom of the file.
Now that’s done, we just need to redirect all non-SSL traffic to SSL. There’s an easy way to do that using your .htaccess file. Check out, “Force HTTPS with .htaccess” for copy & paste directions.

Justin Downey
Justin Downey is Founder and President of JDM Digital. He's a closet nerd, loves craft beer, and is a poor (but improving) golfer.
Get the Email
Join 1000+ other subscribers. Only 1 digest email per month. We'll never share your address. Unsubscribe anytime. It won't hurt our feelings (much).