Batch Process Images in Adobe Bridge
Perhaps the most overlooked program included in the Adobe Creative Suite, Bridge offers some powerful tools for photographers and designers to "batch" process large groups of files using a fairly simple process. Let's take a look at a few examples.

Perhaps the most overlooked program included in the Adobe Creative Suite, Bridge offers some powerful tools for photographers and designers to “batch” process large groups of files using a fairly simple process. Let’s take a look at a few examples.
How to Batch Rename Files
When indexing a large number of images, it may be beneficial to create a file naming convention for better organization. This first tutorial will walk you through the steps required to rename multiple files in one step using Adobe Bridge CS3, though the process is pretty much the same for later CS versions.
NOTE:
A great naming convention is key to organization whether you’re a fortune 500 company or a freelancer. We recommend prefixing names with client abbreviations, not using underscores (use hyphens or CamelCase), start from general to specific, don’t use folders, and always end with a date of creation. For example, JDM-logo-vector-4color-051514.eps tells us everything we need to know about a file without using a ton of folders and useless information.
1. In Adobe Bridge, select the files you want to rename or a folder in the Folders panel located to the left of the window.
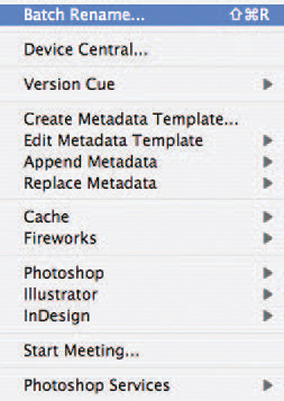
2. Choose Tools >> Batch Rename (See below).
3. Set your batch rename options:
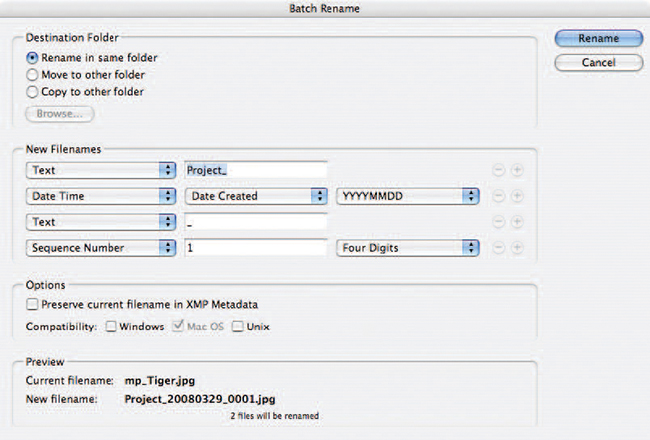
- For Destination Folder, select whether you want to place the renamed files in the same folder or in a different folder, move them to another folder, or place a copy in another folder. If you select Move To Other Folder or Copy To Other Folder, click Browse to select the folder.
- Within the New Filenames portion of the window, choose elements from the menus or enter text into the text boxes. The specified elements and text are combined to create the new filename for each image. You can click the plus button (+) or minus button (-) to add or delete elements. A preview of the new filename appears at the bottom of the dialog box under the Preview section.
- Note: If you choose Sequence Number, enter a number. The number is automatically incremented for each file name.
- Select Preserve Current File Name In XMP Metadata, if you want to retain the original filename in the metadata.
- For Compatibility, select the operating systems with which you want renamed files to be compatible with. The current operating system is selected by default and cannot be deselected.
4. When you’re all done, click “Rename” and watch Bridge get to work.
Batch Apply Photoshop Actions
1. Choose Tools > Photoshop > Batch
Under the Play section of the Batch dialog box, specify the action you want to use to process files from the Set and Action drop-down menus. The menus display actions available in the Photoshop Actions palette. You may need to choose a different set or load a set in the palette if you do not see your action.
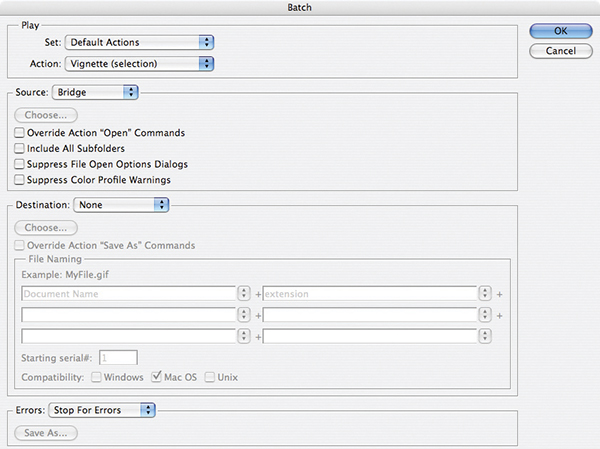
2. Choose the files to process from the Source drop-down list:
- The Folder option will process files in a folder you specify. Click Choose to locate and select the folder.
- The Import option will process images from a digital camera, scanner, or a PDF document.
- The Opened Files option processes all open files.
- The Bridge option processes selected files in Adobe Bridge. If no files are selected, the files in the current Bridge folder are processed.
3. Set processing, saving, and file naming options.
Batch Resize for Web
Perhaps the most common batch process we do with Bridge is batch resize images for web.
Here’s how:
- Open the group of images in Bridge that you wish to resize
- Use Ctrl+a or apple+a to “select all“
- Go to Tools >> Photoshop >> Image Processor
- It will open Photoshop and a dialogue box will pop up
- Select the folder you want to save the files in
- Select the File Type
- For web work, we recommend JPG at quality “80”, convert to RGB and Resize to fit.
- If resizing images of different orientations (landscape and portrait), use a square size (say, 800 pixels). That’ll keep everything in proportion.
That’s pretty much it. Make sure to use a great naming convention and keep your originals. You can always scale images down. You CAN’T go the other way without a horrendous loss in quality.
Mind you, even at a small size, people may still want to steal your graphics. Might look into installing a free plugin like Photo Protect.

Justin Downey
Justin Downey is Founder and President of JDM Digital. He's a closet nerd, loves craft beer, and is a poor (but improving) golfer.
Get the Email
Join 1000+ other subscribers. Only 1 digest email per month. We'll never share your address. Unsubscribe anytime. It won't hurt our feelings (much).